
Reaper is a powerful, flexible and customisable audio application. You can use Reaper for music creation and production, podcasts, voice-over, sound design, audiobooks, live performance, mixing for video, mastering, and much more.
In our free Reaper course, you’ll learn the basics of Reaper with Dave Bode, and in this lesson Dave will show you how to use tempo, grid, and snap settings. You'll learn how to change tempo in Reaper, how to use the grid in Reaper, and how to use snap in Reaper.

How to Use Reaper Tempo, Grid, and Snap Settings
Tempo - How to Change Tempo in Reaper
The first thing that I want to show you is what happens to media items in Reaper when you adjust the tempo and how to change tempo in Reaper. Right now, my project is set to 95 beats per minute and my media items take up four full measures.


You can see here in the ruler that each ‘block’ is a measure and after the fifth one, there's nothing here, so these media items are four measures long.


If I change the tempo from 95 to 110 you can see in the range area, things have shrunk, horizontally, and my items are now shorter than they were before, and you can see that above each media where it says, rate 1.158. That means that they are playing back faster, so that they still take up the same amount of musical space. They're still four measures long, but because 110 has more beats in it per minute, they need to be shorter.
Reaper has done some time stretching to make these shorter, and it's kept the pitch exactly the same, so it still takes up the same amount of musical space for measures.


If I adjust the tempo to be slower, to 80, Reaper will stretch the items the other way and you can see that the rate has been set to 0.842. They're slower than they were before, but they're still taking up the same amount of musical time. This is the default behaviour for Reaper, and it's very useful when you are recording and editing music.
However, this is not always what you want. There are many times when you are going to want to adjust the tempo in Reaper, but you don't want Reaper to adjust the rate of your items. In order to do this, you need to change something in the Project Settings.
Adjust Project Settings


In the Project Settings tab, there's and option to adjust the time base for items, envelopes, and markers. By default it’s set to beats position, length, and rate. But if you don't want Reaper to adjust the rate of your items, you can change this to time.


Once I’ve done that, when I change the tempo, you can see the grid in Reaper has now changed, the Arrange area is changes, but the length of my items won't change.
You may be wondering why this is useful. Sometimes I need to edit some pre-produced music, and what I want to do is to align the grid to my music, and I don't want the rate of my music to change.


When I'm doing that, I change the timebase over to time so that the rate of my audio item doesn't change. Other times, I will be editing a voice-over, a podcast, or an audiobook in Reaper and for those projects, I also set the timebase to time so that I don't inadvertently change the tempo and alter the rates of my dialogue tracks.


In this example, I have a simple project with one track. This track has a virtual instrument on it from Spitfire Audio. It's a simple drum kit, and in the Arrange area, I have a MIDI item that has a simple drum beat that repeats for a minute or so. In Project Settings it’s set to Beats for the time base.


If I change the tempo from 70 to 80 (as above), instead of adjusting the rate of the MIDI item, the MIDI notes actually align to shift to the new tempo, so you won't see a rate indicator above the MIDI item. In other words, instead of time-stretching the audio - because this isn't audio - with MIDI, it's just triggering the notes at a different time so that they still align to the tempo.
Insert a Tempo Marker


When you change tempo in Reaper, you should know that you can also have more than one tempo in your project - just insert a tempo marker. You can add a tempo marker by right-clicking in the ruler area, and choose Insert tempo/time signature marker.
You can also find that in the Insert menu > Insert > Tempo/time signature change marker, or use the keyboard shortcut Shift+C.


There are several options here starting with the tempo. I'm going to change this to 120. You also have the option to set a time signature. My project by default was set to 4/4 time, but I could set it to a new time signature here if I wanted to. I could also change the BPM basis, so instead of having one beat be a quarter note, I could have it be an eighth note or one of the other options.
You also have the option to set a different metronome pattern and you can gradually transition tempo to the next marker, but I'm just leaving all of these at their default and only change the tempo to 120.


A couple of things changed in the Arrange view and the Ruler area. I have two tempo markers, the one on the right is the tempo marker that I inserted, but any time you add a tempo marker, Reaper will automatically add another tempo marker with whatever your tempo was originally, at the beginning of your project (on the left).


You can also see a blue line showed up in the Master track, and if you hover over this, you'll see that this is the tempo map envelope. The envelope is a line representing what the tempo is at any given time in your project.
At the moment, when it gets to measure 5 we have an increase in tempo and it jumps immediately to 120 beats per minute.


If I double-click on that first marker, you can see an option that says Gradually transition tempo to next marker. Right now, it's maintaining 80 BPM until measure 5, and then it instantly goes to 120, but by checking this and then clicking OK, now it's going to slowly increase the tempo over these four measures until it gets to measure 5.
Grid in Reaper
Grid Settings


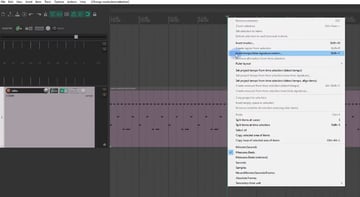
I'm going to jump back to my previous project and we’ll take a look at the grid. The grid is made up of vertical lines in the Arrange area, and you can enable and disable the grid with this button shown in the screenshot above.
The grid in Reaper helps you to align your media items and arrange your project, and it can be adjusted to fit your needs. Currently, the grid is set to quarter notes and you can change that by right-clicking on the grid button which opens up the Snap Grid Settings.


The top section of the Snap Grid Settings deals with the grid. The main thing that you want to adjust is the grid line spacing. It's set to quarter notes, but often I'll change this from quarter notes to something like eighth notes or even sixteenth notes. If I do that, more grid lines show up in the Arrange area, which is very helpful if I'm trying to align things with more precision.
You have several other options to choose from. You can do 1, 2, and 4 measures, and you can even set this to Frame, which sets it to your video frame rate, which you can set in your project settings.
These options with the T at the end, stand for triplet: quarter note triplet, eighth note triplet, sixteenth note triplet, and so on. There's also an option where you can swing your grid, and adjust the swing of your grid. This is something that I’ve never used, because in jazz music, swung eighth notes are the same thing as a quarter eighth triplet, so usually, if I have a project that has anything to do with swing, and I want my grid to be showing me a swung rhythm I’ll set this to eighth note triplets, and that works just fine for me. You can do whatever works best for you.
Reaper Snap and Snap Settings


The Snap enabled button is right next to the Grid button. Snapping allows you to easily align your items, markers, and envelopes, and the cursor, to whatever you have the Reaper snap setting, set to. Right now, if I try and move my media items, they jump from beat to beat because snapping is enabled, and it's going to snap the media items from beat to beat. There's no way to put it in between two beats unless I disable snapping, which you can do by clicking the button or use the keyboard shortcut Alt+S or Option+S on Mac.
If you disable snapping, you can move much more freely and with a lot more precision. It's a lot easier to arrange and move your media items around, especially in a musical context, if snapping is enabled, so I generally keep that turned on.
The Edit and Play cursor also to the grid in Reaper too, and it will also snap to other things in your project, which you can set in the Snap settings by right-clicking on the Snap button.
Reaper Snap Settings


I'm just going show you a few things in Reaper's Snap settings. One of those is what you can snap to. There are two lines of options that you'll want to check out: snap media items, selection and cursor to selections, markers or cursors. And underneath you can snap media items selection and cursor to the grid, and you can uncheck those and make it work however you want.
Let's say you didn't want to snap media items to the grid, but you still wanted to snap media items to selection, marker, and cursor. You can uncheck those options and now you can move the media along and it won’t snap to the grid but it will snap to the edit cursor.
If I make a time selection, it will also snap to my time selection, which just so happens to be snapping to the grid. However, I can uncheck Selection from the grid and then I can make a free time selection and my media item will snap to that time selection, which is very handy.


You can make this effect more dramatic by going into the Reaper Snap settings and changing the snap distance.


If I bump it up to something like 30 and then move my media item, it will now jump right to that cursor in time selection from what looks like a larger distance away because that's what it's set to. It’s snapping from about 30 pixels away, so now I have to pull to the right 30 pixels before it's going to move. It just makes the snapping a little bit more effective, or a little bit more aggressive.
Snapping in the grid is a useful tool for making sure all of your items, your markers, and your envelopes are exactly where you want them to be in your project. Hopefully you've now got a good working knowledge of how to use them.
About This Page
This page was written by Marie Gardiner from the transcript of a course by David Bode. Dave is an expert on video and audio production. Marie is a writer, author, and photographer. The page was edited by Gonzalo Angulo. Gonzalo is an editor, writer and illustrator.
 By
By


